No edit summary Tag: Visual edit |
No edit summary Tag: Visual edit |
||
| Line 279: | Line 279: | ||
* '''Element:''' Earth [[File:UIEarth.png|frameless]] |
* '''Element:''' Earth [[File:UIEarth.png|frameless]] |
||
* '''Weakness:''' Water or Plant spellbooks |
* '''Weakness:''' Water or Plant spellbooks |
||
| − | The Megolemech is by far the toughest in the game, as while it is not the strongest, it cannot be fought with a spaceship. To reduce the massive amount of damage that it deals, you can equip water spirit robes or something that resists all elements, such as carapace armor. You will also want a Book of Flood, bound to a magic staff, and a Book of Shielding, plus a lot of stamina restoring food. It is much harder to fight on the science path, but you can, using an Exo Mech with a lot of Chromium and Exotic Matter. The Exo Mech Gun and the Exo Mech Shield are best for this purpose. |
+ | The Megolemech is by far the toughest mini-boss in the game, as while it is not the strongest, it cannot be fought with a spaceship. To reduce the massive amount of damage that it deals, you can equip water spirit robes or something that resists all elements, such as carapace armor. You will also want a Book of Flood, bound to a magic staff, and a Book of Shielding, plus a lot of stamina restoring food. It is much harder to fight on the science path, but you can, using an Exo Mech with a lot of Chromium and Exotic Matter. The Exo Mech Gun and the Exo Mech Shield are best for this purpose. |
== Chimera == |
== Chimera == |
||
Revision as of 22:55, 29 May 2020
All of the bosses, except for Death, Alien Cruiser and Dice, can be found in the Colosseum (beneath Eastern Island), along with a few mini-bosses. The being inside will offer insight into how to defeat them.
Adult Dragon
- Location: Starting Island, Dragon Cave on the eastern side
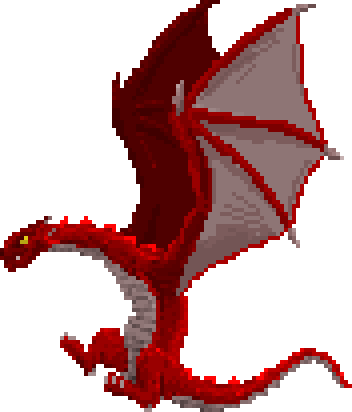
- HP: 30
- ATK:5 +2-3 burn
- DEF: 3
- EXP: 4 per damage, 120 overall
- Drops: 1× Fire Gem, 5× Dragonblood
- Attacks: Fire Breath - Continuous, high ranged attack that targets the player and can break blocks.
- Element: Fire

This is an optional boss for the Dragon questline. If you summon the Alchemist before you defeat the dragon it will give you a quest to hatch 5 baby dragons. It will then become your friend and will fly you to magic island. The Adult Dragon can be "respawned" by raising Dragons. Will not attack player unless attacked first. The Dragon will fly around and chase the player. It will return to its nest if the player flees. The Dragon has the fire element and takes more damage from water and earth element weapons.
Golemech
- Location: Starting Island. Golem factory on the east side, deep underground. Access requires Earth Gem.

- HP: 60
- ATK: 19
- DEF: 5
- EXP: 6 per damage, 360 overall
- Drops: 1× Earth Gem, 3× Blood Gem
- Attacks:
- Golem Spawn
- Fist Smash

- Eye Laser
- Element: Earth
- Weakness: Water or Plant weapons
After the initial boss fight, it can be respawned with an Earth Gem at the Golem Factory.
Wyrm Queen
- Location: Magic Island, Underground portal on the east side.
- HP: 12
- ATK: 0
- DEF: 9, 2 while spawning Wyrms (Only from front)
- EXP: 10 per damage, 120 overall
- Drops: 1× Spirit Gem, 2× Dragonblood
- Attacks: None. Spawns Wyrms, which is her main "attack".
- Element: None
Lanterns or any item that illuminates areas are recommended. The Wyrm Queen is nigh invulnerable (Fire is semi-effective). She does not attack directly. She spawns Wyrms when Wyrms are killed, which can attack the player. However, the Wyrms will not attack you if you equip a Shadow Cape or other invisibility item. The only weakness is when the Queen opens her mouth to spawn Wyrms. The Queen will respawn when the player either leaves the arena or stays in the arena long enough. She will not respawn in the original den, however.
The Mirrows
This is a dual boss fight. Like the dragon quest line, this can be an optional boss fight.
| Lightning Mirrow | Tentacle Mirrow | |
|---|---|---|
|
Sunset Haven Crashed Colony Ship | |
|
30 | 30 |
|
20 | 15 |
|
4 | 4 |
|
5 per damage, 150 overall | 5 per damage, 150 overall |
|
None | None |
|
Lightning ball, Lightning Hand | Charge |
|
None | None |
One strategy to help beat the Mirrows is to use a lot of healing items and Landmines. Bringing a familiar will help too. A ranged weapon will help you with the tentacle Mirrow, making the fight much easier, as she does a lot of damage, but only at close range. The other Mirrow can be defeated with a Chainsaw (Enchanted one is better) and a lot of healing, as he has both ranged and close up attacks. If you'd like to brute force the fight, around 20 cheeseburgers and a fire sword spam will do the trick.
The Old One
- Location: Magic Island, underground Bedrock chamber
- HP: 45
- ATK: Magic Homing Balls 25, Laser Beams 100
- DEF: 25, 3 when overcharging
- EXP: 4 per damage, 180 overall
- Drops: None
- Attacks:
- Magic Homing Balls
- Laser Beams
- Element: None
- Weakness: Use fire when its armor opens. You can also have a pet attack it for you.
You can have The Alchemist fight this boss for you; however, if you have The Alchemist fight for you, he will die. A shield would also make this fight a lot easier, since shielding (holding space) will block all damages from the orbs (including the charge attack). Guns and bows are effective or fire element swords. It has 2 stages, orb only and laser. Stay behind the alchemist, and move towards the Old One when the final orb is released if using melee. You can't run from them, they can phase through rock. The laser stage engages when it reaches half health. It will spawn more orbs per cycle, and shoot a laser directly at the alchemist, filling the room before charging to the other side. Hide in the opening of the cave to not get hit.
Pirate Ships
- Location: Divider Island East Side
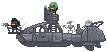
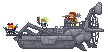
- HP: 80 & 60
- ATK: 40 & 40
- DEF: 4 & 4
- EXP:
- Drops: None
- Attacks: Ranged attacks
- Element: None
You can find both Pirate Ships guarding their base on the east side of Divider Island. You must defeat them both to access the structures on this side. Defeating them also completes the quest Defeat Pirates, which lets you stay at the Inn for free. The downside is that debris will no longer spawn in the ocean between Sunset Haven and the Starting Island. One effective strategy to beat them is using a Patrol Boat coupled with a Patrol Boat Launcher. Using enchanted Missiles makes this strategy even easier. A Patrol Boat Gun with about 70-80 normal Bullets also works. One late game strategy is to fight them with a Dragonship, or an Escort Fighter.
Kraken
- Location: Underwater Between Sunset Haven and The Heights; In Cave on Divider Island; Under the Elder Dragon mini-Island

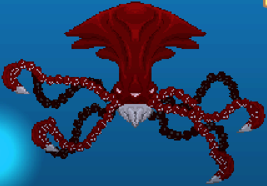
- HP: 50
- ATK: Tentacles 25, Mouth 100
- DEF: 5
- EXP: 6 per hit, 300 overall (Exp gained from tentacles)
- Drops: Water Gem, Ink x3
- Attacks: Tentacles, Mouth
- Element: Water
You need to destroy the tentacles to access the head, shooting at the head will decrease its HP. Ice Torpedoes are extra effective against the Kraken. Using the Book of Vines coupled with two-three Ice Creams is an efficient late game strategy. A strategy for even later in the game is to use the Mobile Lab's ram damage to constantly hit the Kraken while shielding, which ensures an easy victory, no resources spent, and is also hilarious. You can xp farm by destroying the tentacles, but not the head, and letting them regrow.
The Cultivator
- Location: Cultivator Island

- HP: 200
- Atk: Spores 15, Gas Cloud 9, Ground Attack 20
- Def: 5
- Exp: 6 per damage, 600 overall
- Drops: Plant Gem, Plant Eye x3
- Attacks: Spores, Gas cloud, Ground Attack
- Element: Plant
Weak against Fire and Ice. Optimum attack pathway is through the air where the Cultivator is limited to its Spores attack. The Cultivator is possibly the easiest boss in the game.
The Storm
- Location: Cultivator island, on the Dragon Ship Factory floating island. You will need a spaceship, a jet with the upgraded engine, or an elder dragon to go there.
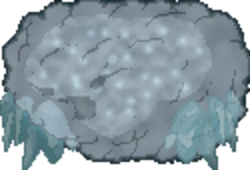
- HP: 60
- ATK: 30
- Def: 6, Immune to non-Fire element weapons, 50 while in tornado form
- Exp: 4 per damage, 240 overall
- Drops: 1x Ice gem, 3x Ice Heart
- Attacks:
- A storm cloud which rains ice, does heavy damage
- Storm cloud form can also attack in front of it with icy wind
- A giant tornado which shoots icicles at the player
- Element: Ice
Melee weapons, such as Dragon Sword or other Fire enchanted strong weapons, are effective against the Storm. Attack the Storm by climbing up the walls, where its storm cloud attacks cannot reach you. When its tornado attack comes, just dig underground. Shields will not provide protection from the icicles. An Elder Dragon that is modified with a Horn can also deal damage to the Storm. Alternatively, you can have the Elder Dragon kill it for you once you have made an Evolution Gem for a Revitalizing Potion (from the first Sea Witch quest).
Alien Bomber
- Location: In space, above the Starting Planet, during both waves of Bombardment; in space, above the Enemy HQ (x2)
- HP: 2000
- ATK: 100
- Def: 7, has 115 when shielded
- Exp: 8 per damage, 16000 overall
- Drops: 1x Exotic Matter
- Cargo: 2-5 Evolution Shards, 1 Exotic Matter, 10-25 Steak (Multiples of 5 only), 0-9 Focus gems, 0-4 Alter Gems, 0-4 Blood Gems.
- Crew: 3x Alien Crew
- Attacks:
- Lasers
- Plasma Ring
- Bomb - if allowed to hit ground, will destroy structures. If close enough, explosion can damage the bomber. Will not use this attack while above the Enemy HQ
- Element: None
Use a Dragon Ship, With about 200 steak, 12 blood gems and you should be good to go. Heavy Fire weapon is recommended, because it can pierce through the minion ships. If you decide to use the Fighter Escort, then you could try to use antimatter missiles as they are the only weapon that can pierce their shields. The Bomber continues to bomb the starting planet even as you fight it. However, you can go under it, causing your ship to be hit by the bomb instead of the planet being hit. However, the bombers above the Alien HQ will not bomb, because then they would hit their own planet. If you are close enough to the bomber, the explosion will also damage it. You can have The Mirrows kill the one above the starting planet during the first wave for you, but they will die. The best way to kill the bomber is to board it, because then, after killing the crew, you can loot the cargo. Also, this will allow you to take it over. You can do the same for the fighters around it, allowing you to get a lot more loot.
Alien cruiser
- Location: In space, above the Enemy HQ; in space, above the Starting Planet, during the second wave of Bombardment (x2)
- HP: 5000
- Atk: Electricity laser 100, Homing 500
- Def: 7, 115 when shielding
- Exp: 8 per damage, 40000 overall
- Drops: 2x Exotic Matter
- Cargo: 2-5 Evolution Shards, 1 Exotic Matter, 10-25 Steak (Multiples of 5 only), 0-9 Focus Gems, 0-4 Alter gems, 0-4 Blood Gems.
- Crew: 3x Alien Crew, 1x Dragomech
- Attacks:
- Electricity laser
- Homing blast
- Element: None
The best way to defeat this ship is to board it, same as with the bomber. You can take it over with the Book of Translation, and loot its cargo. It is almost impossible to kill without boarding, because of its 5k health and almost impenetrable shield. Even after killing the crew, it is tedious to destroy.
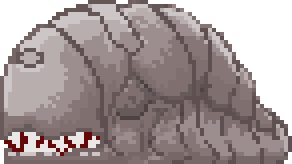
Nursery Crab
- Location: In Nursery on Enemy HQ

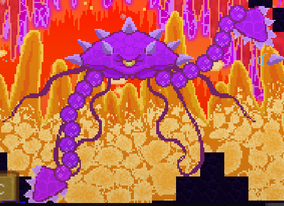
- HP: 80
- ATK: Tentacles 15, Spike 40
- Def: 7
- Exp: 8 per damage, 640 overall
- Drops: Nothing
- Attacks:
- Tentacles
- Spikes
- Element: None
First, take care of the Alien Cocoons and Hatchlings. They will just bother you while you attack the crab. Afterwards, start by destroying the tentacles. Stay above the area that it shoots spikes to, and you should be safe to stay still and attack, as the boss doesn't move. Another way of beating it is by hiding behind some of the bedrock and attacking with a spirit bow, as the spirit bow can pass tiles.
Final Boss - Phase 1
- Location: in Enemy HQ heart

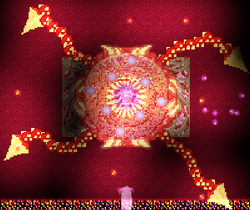
- HP: 400
- ATK: Tentacles 25, Beam 100, 25 Homing Launchers
- Def: 10
- Exp: 11 per damage, 2750 overall
- Drops: Nothing (will transform into phase 2)
- Attacks:
- Tentacles (Can be killed separately, but will regrow)
- Beam
- Homing Launchers (Can be killed separately)
- Element: None
Ignore everything except the main section. Go above the area the beam attack hits, and attack it Use the Book of Shielding, or the Energy Shield and a lot of batteries, to block the launcher's attacks, or use a Book of Flood in the center to destory them all. Don't use the Stealth Helmet, as none of the boss' attacks are fooled by invisibility. Bring a lot of Dragonblood to recover both health and stamina from using the spellbook.
Final Boss - Phase 2
- Location: Enemy HQ Heart after defeating phase 1.
- HP: 1500
- ATK: Meteors 40, Flood 24, Tornado 60, Spikes 70, Spores 48, Homing Launchers 200
- Def: 10
- Exp: 12 per damage, 12000 overall
- Drops: 3x Exotic Matter, 1x Alien Heart
- Attacks:
- Meteors
- Flood
- Tornado
- Spikes
- Spores
- Homing Launchers
- Spawn Charged Cockatrice
- Spawn Charged Snaptopus
- Spawn Charged Icer
- Spawn Charged Golem
- Spawn Charged Crawler
- Meteors
- Element: Changes depending on HP
Once every 150 damage it takes, the boss changes element and attack: fire, then water, then ice, then earth, then plant. Each attack is the effect of a tier 3 spellbook.
To avoid meteors, go far under the boss when it's about to attack. To avoid flood, go in any direction away from the boss when it's about to attack. To avoid tornado, run away until the tornado disappears. You can also just block the tornado. To avoid spikes, go under the boss when it's about to attack. To avoid spores, get really close to the boss.
The boss also has an upgrade of the homing launchers, that deal more damage than any other attack. It homes into you, so it's highly recommended you block. For which shield to use, the energy shield is the best for that amount of attack. It is also recommended that a lot of cake or ice cream be stockpiled due to its 300/450 stamina recovery and dragon blood being insufficient on both health and stamina recovery unless the latter is cast manually.
After losing half of its health, the boss will summon 3 enemies of its current element. First Cockatrices, then Snaptopuses, then Icers, then Purple Golems, then Crawlers. The enemies summoned are stronger than usual. Don't use the Stealth Helmet, as none of the boss' attacks are fooled by invisibility, except the enemies the boss summons. The enemies that it summons will drop normal loot, and can even be captured, but will turn into normal versions of themselves when captured.
Another option is to employ the Exo Mech and bring a bunch of exotic matter and chromium for shields, repairs, and ammo. It helps to have the Exo Fighter pilot familiar too.
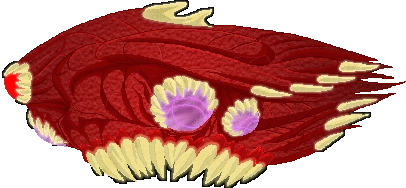
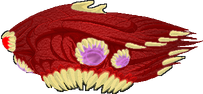
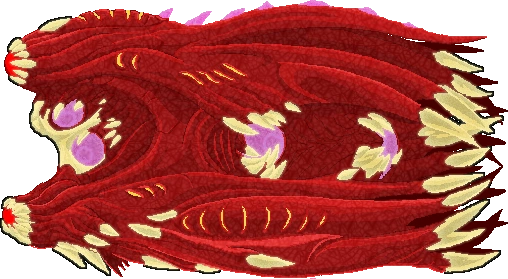
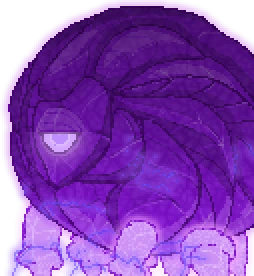
Megolemech
- Location: Divider Island. Megolemech factory in the underground maze behind a layer of bedrock. Access requires Golem Key and a tool/vehicle with Mine 9.
- HP: 1000
- ATK: Fist Smash 300, Fire Breath 300, Homing Eye Laser 150
- DEF: 15
- EXP: 6 per damage, 6000 overall
- Drops: 5× Earth Gem, 5× Blood Gem
- Attacks:
- Fist Smash
- Homing Eye Laser
- Fire Breath
- Fist Smash
- Element: Earth
- Weakness: Water or Plant spellbooks
The Megolemech is by far the toughest mini-boss in the game, as while it is not the strongest, it cannot be fought with a spaceship. To reduce the massive amount of damage that it deals, you can equip water spirit robes or something that resists all elements, such as carapace armor. You will also want a Book of Flood, bound to a magic staff, and a Book of Shielding, plus a lot of stamina restoring food. It is much harder to fight on the science path, but you can, using an Exo Mech with a lot of Chromium and Exotic Matter. The Exo Mech Gun and the Exo Mech Shield are best for this purpose.
Chimera
- Location: Unnature Sanctuary, after completing all of the Ranger's quests
- HP: 200
- ATK: Slash 120, Ranged 50
- DEF: 8
- EXP: TBA
- Drops: Nothing
- Attacks:
- Slash
- Homing ranged
- Element: None
You fight the chimera as the final boss of Unnature Sanctuary. Defeating it puts Splicer under your control, and allows you to turn human again. A good strategy is to try to not get close, at it does massive close range damage, and block the ranged shots - werewolf claws can be used to block. There is a timer for it, after which it is turned into a rat and automatically defeated.
Dice
- Location: Unnature Sanctuary, underground maze
- Hp: 500
- ATK: Claw 80, Howl 18x8
- DEF: 8
- EXP: TBA
- Drops: Nothing
- Attacks:
- Claw
- Howl
- Element: None
Dice is the other boss on Unnature Sanctuary. He first appears as the backer NPC Dice, but after talking to him, he transforms into a giant werewolf and attacks. He has a short range attack that deals damage all around him and very powerful melee attacks, so a ranged weapon is the best way to fight him. Defeating him unlocks two more options for modification by Splicer.
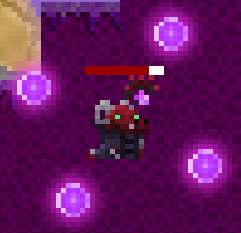
The Dishonored One
- Location: The Depths Island after completing the "Ancient Ruins" quest

- HP: 150
- ATK: Homing Orbs 25, Flood 24
- DEF: 4
- EXP: TBA
- Drops: Book of Beacons
- Attacks:
- Homing Orbs
- Flood
- Element: None
High defensive power and ranged weapons are the best tools against the Dishonored One. If using science to beat him, have a Mobile Lab on standby to resupply power and frequently recover health and stamina. With magic, use a wand and book of shielding to block the orbs. After half his health is gone, he will launch double the orbs like the Old One. He launches 2 volleys of orbs in either phase and teleports right next to you afterwards, then unleashes the flood spell, during which his shield drops, then he sets up more orbs after the flood is gone. Every hit he takes will cause him to raise his shield again.
Death
- Location: Final floor of Death's Door dungeon
- HP: 100
- ATK: 50, ignores armor
- DEF: 0, but as a spirit, can only be damaged with spirit weapons.
- Drops: 100 Spirit, Death's Scythe if captured
- Attacks: Scythe Slash
- Element: None
Because of the small platform you fight Death in, there's not much space to dodge its attacks. Because of this, you will need a Book of Shielding or Interstellar Broom to block the attacks instead. A good strategy is to use a combo of the Spirit Fish familliar and Spirit Bow, running away from Death and shooting him, while the Spirit Fish attacks him up close. This not only deals damage faster, but also slows Death down, making it so you'll be hit less. When Death approaches, equip a Book of Shielding or Interstellar Broom, run past it while blocking to the other side of the platform and start shooting again. If you want to try and capture death, remember to order your Spirit Fish to stop attacking, as it may accidentally kill Death. You may also use a spirit fox helm since it deals much less damage and is more reliable when controlling an optimal capture health.
Unlike most other bosses, Death can be fought again outside of the Colosseum. After leaving Death's Door the dungeon resets, meaning Death respawns as well.